Changing State Employee Classification
When an individual changes to a state employee or a state employee changes
to an individual and
the individual is using their social security number, a new Supplier ID
does not need to be created.
- If a state employee changes to an individual
with an Employer Identification Number (EIN) follow the "Adding a Regular Supplier" section.
Review Supplier Forms
Verify the following documents have been received and are complete.
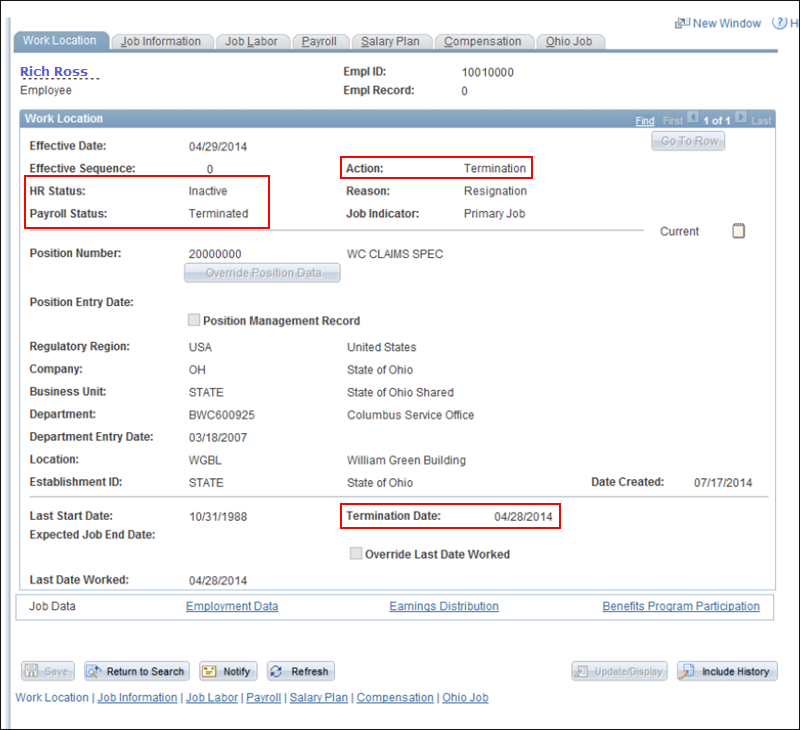
- If an individual is changing to a state employee:
- If a state employee is changing to an individual:
Search for Supplier Record
Updating the Supplier Record
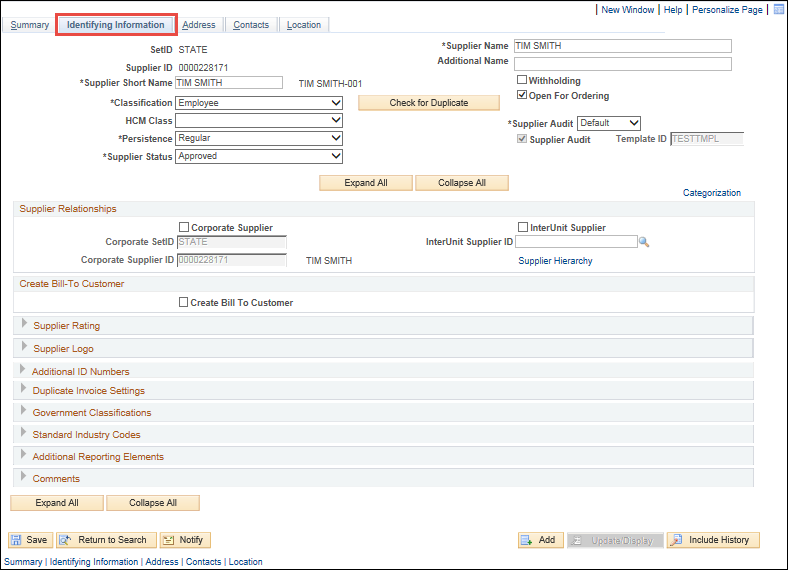
To begin, click on the
Identifying Information tab
Identifying Information tab.
Identifying Information tab

- Change the Classification
to:
- State Employee = "Employee" or
- Individual ="Supplier"
- Expand the Additional
ID Numbers section.
- Update the ID Number
field with:
- State Employee = "E" followed by the employee's
OAKS User ID (from the HCM paperwork) (e.g., "E10110001")
or
- Individual = Social Security Number
- If a state employee changes to an individual
with an Employer Identification Number (EIN) follow the "Adding a Regular Supplier"
section.
- Expand the Additional Reporting
Elements section.
- Select the applicable Type of
Contractor from the dropdown:
- State Employee = "State Employee" or
- Individual = "Social Security Number"
- All supporting documentation must be attached
to the supplier's record on the Identifying
Information tab.
- Acceptable form formats include JPEG,
PDF and TIF.
- Click herehere
for instructions on attaching supporting documentation to the
supplier record.
- Click the Attachments
link.
- The Supplier Attachment
page displays.
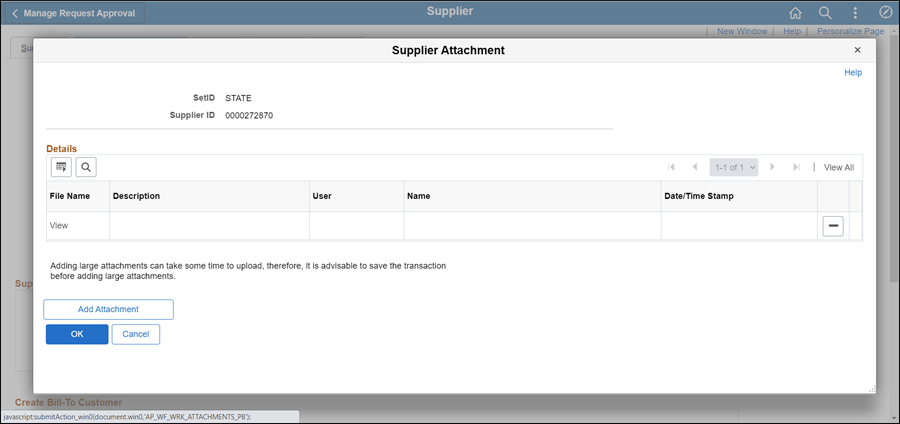
- Click Add Attachment.
- Copy the Document URL
from the Supplier Operations Tracker.
- Click Browse.
- Paste the Document
URL into the File
name.
- Click Open.
- Click Upload.
- The Supplier Attachment
page displays.
Update Description with <descriptive
name of the document> (e.g., "VIF W9 EFT").
Click OK.
- The Identifying
Information tab displays.
- Click the Address
tab.
Address tab
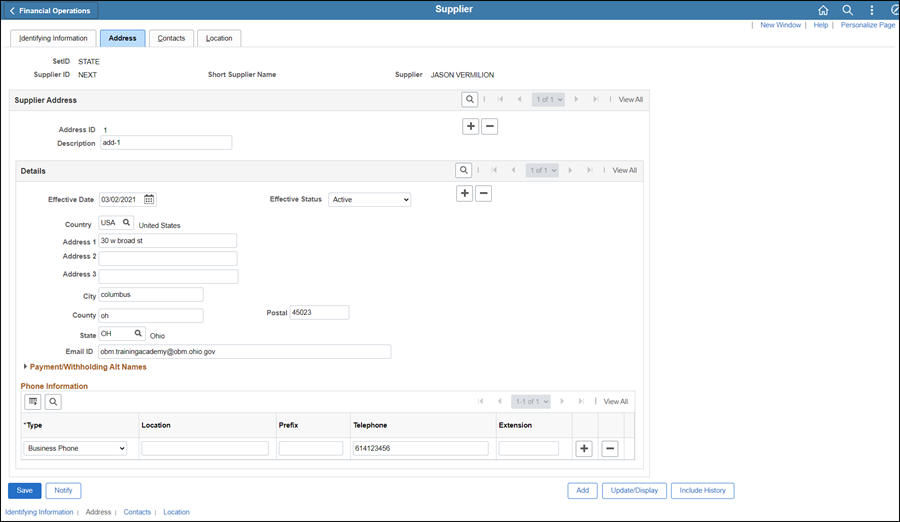
- Click the Add
a new row icon next to the Address
ID field.
- Update the Email
ID field with the work e-mail address, if provided.
- Do not enter a home e-mail address.
- Select Phone Information Type
dropdown and select the applicable option.
- The Prefix
field should remain blank.
- Update the Telephone
field with the phone number provided (format 6145555555).
- Click the Location
tab.
Location tab
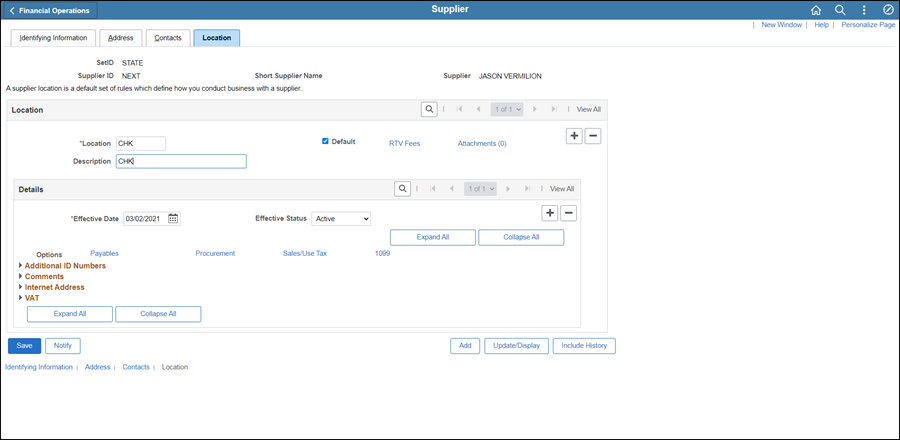
- In the Details section, click the
Add a new row
icon next to the Effective
Status field.
- Click the Procurement link.
- Click Additional Procurement Options
to expand the section.
- If
updating a State Employee:
- Click the
Payment Terms Options
dropdown and select "Specify."
- Click the
Look Up Payment Term
ID icon and select "00 Due Now."
- If
updating an Individual:
- Click
the Payment
Terms Options dropdown
and select Default
from higher level.
- Click OK.
The
Location tab displays.
- If the supplier is being changed to a state employee, click
the 1099 link
on the CHK Location.
- Enter "IRS" (Internal Revenue Service)
in the Entity field.
- Enter "1" in the Address
field.
- Enter "S" (Social Security Number) in the TIN
Type field.
- Enter the employee's social security number in
the Taxpayer Identification Number
field.
- Click OK.
- The Location tab
displays.
- Click the Comments collapsible region.
- Enter Comment,
"<Date> <Description of changes> <associate's
initials>" at the top of the field (above any previous comments).
- Do not delete previous comments.
- Click Save.
- The Preview Supplier
Audit page displays an audit of the changes made
to the suppliers account.
- Click OK.
- Click the Summary tab.
Summary tab
The supplier file Summary tab
provides an overview of the supplier record.
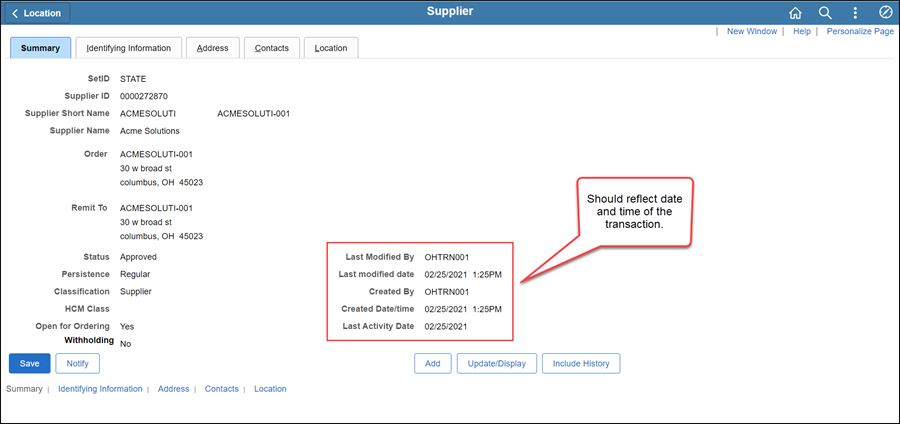
Once all updates have been made to the supplier record, review
the Summary tab to
verify that the record was modified.
 Next steps - Updating the Supplier
Operations Tracker
Next steps - Updating the Supplier
Operations Tracker